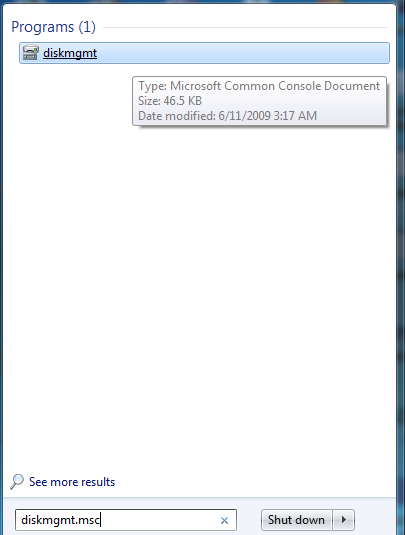
Step 1. Click Start and type “disk mgmt.msg” (without quotes) and press enter. Now a disk management window will appear.
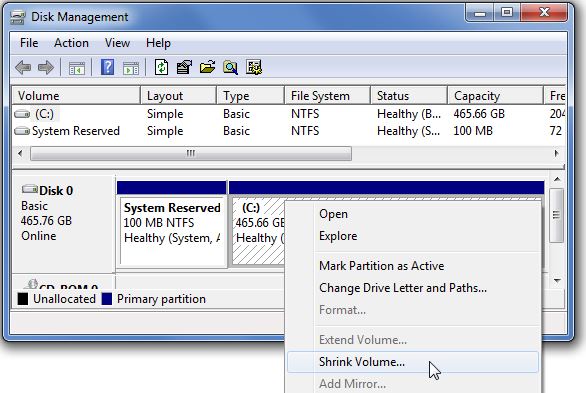
Step 2. Here you can see all your drives which are being currently available. Choose one of the drives which you want to shrink or extend. For shrinking, a drive and creating a new one there must be some free space on that drive. Now right-click on the drive letter which you want to shrink Or take out free space. Now select shrink volume, & a little process will go on.
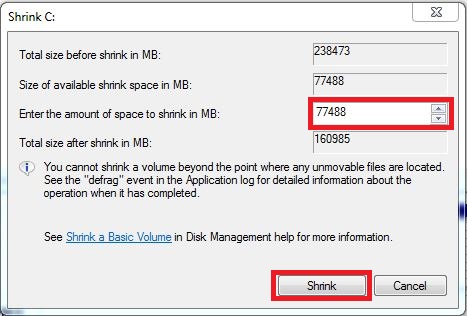
Step 3. Here you will see the current size of the drive, free space and size which you want to shrink. Now enter the amount of space which you want to free, note that size should not exceed the free space. Now click shrink button.
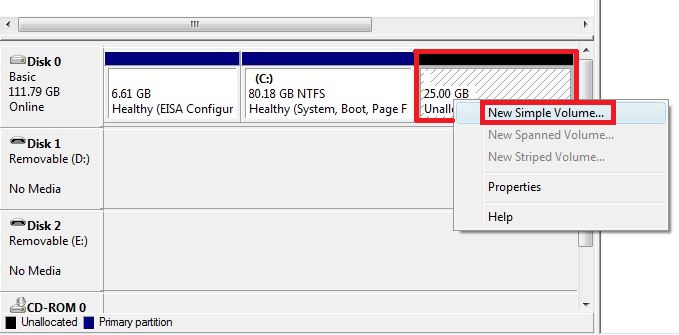
Step 4. In disk management window you will see an unallocated space at the right bottom corner. Right-click on it and select New Simple Volume.
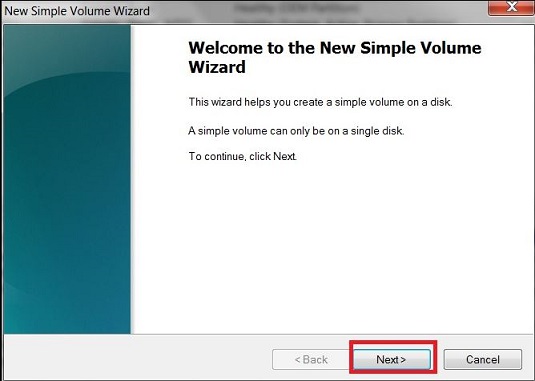
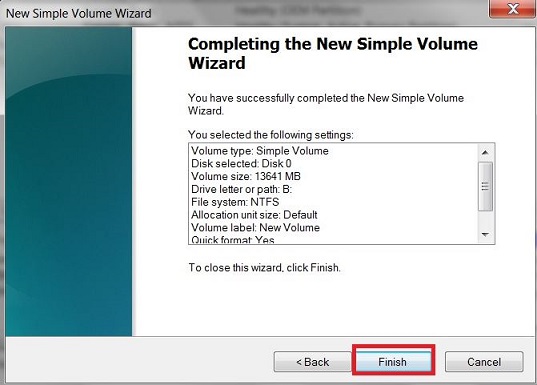
Step 5. Now you will be taken to “New Simple Volume Wizard” here you need to create a partition. Simply click “Next” to continue.
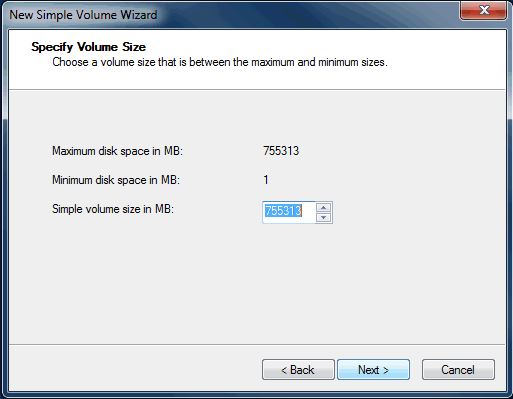
Step 6. Now on the very
next page, you need to specify the volume size. You need to add the
volume size here. Simply enter the volume and click on next.
No comments:
Post a Comment